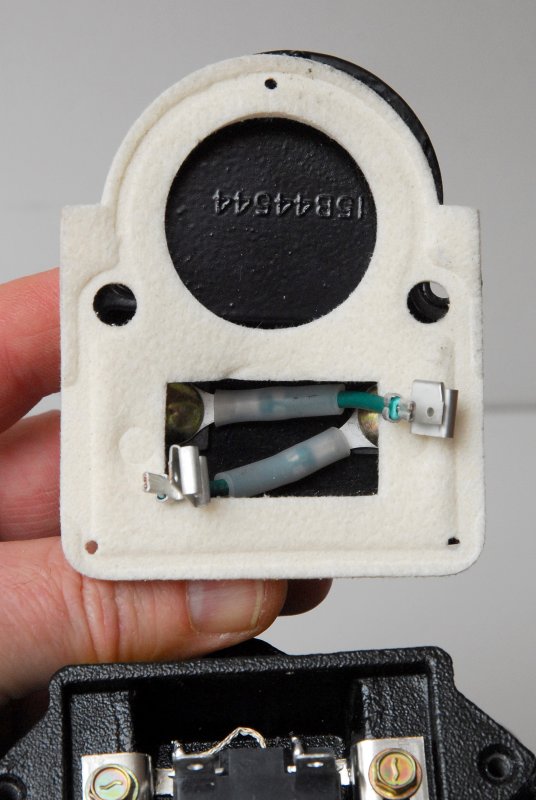
Here's the view from inside the cover plate with everything torqued down and tight.
*******CLICK BELOW FOR PAGE 2*******
Install The Spark Arrestor
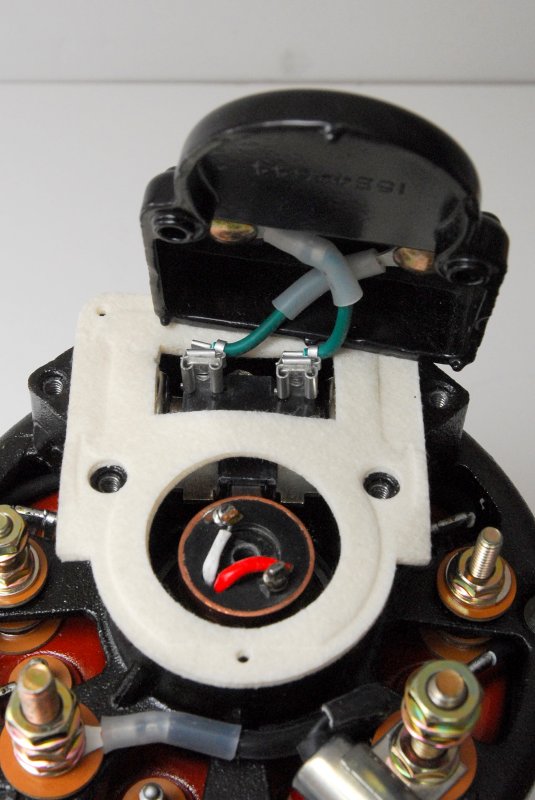
Place the spark arrestor gasket over the conversion plate before connecting the wires.
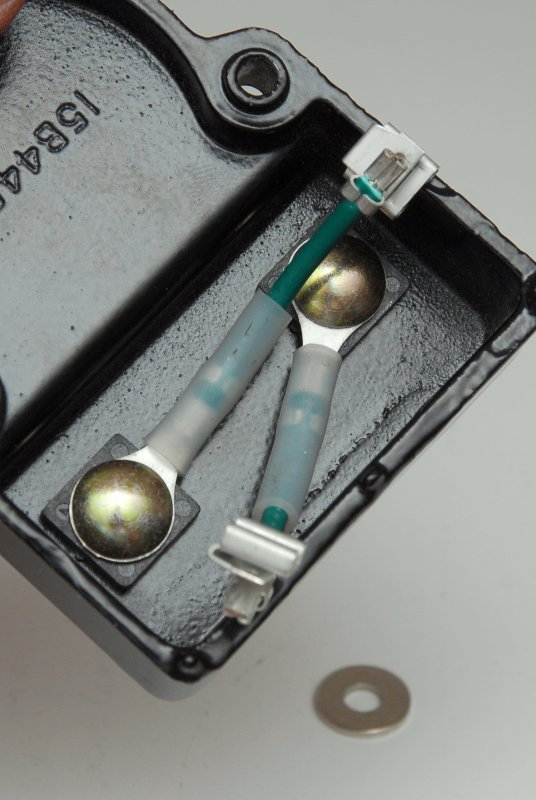
Slide The Connectors Onto The Brushes
Slide the contacts onto the brush studs. It does not matter which way you connect these green wires as one will become the field contact and the other will be grounded to the alternators ground stud.
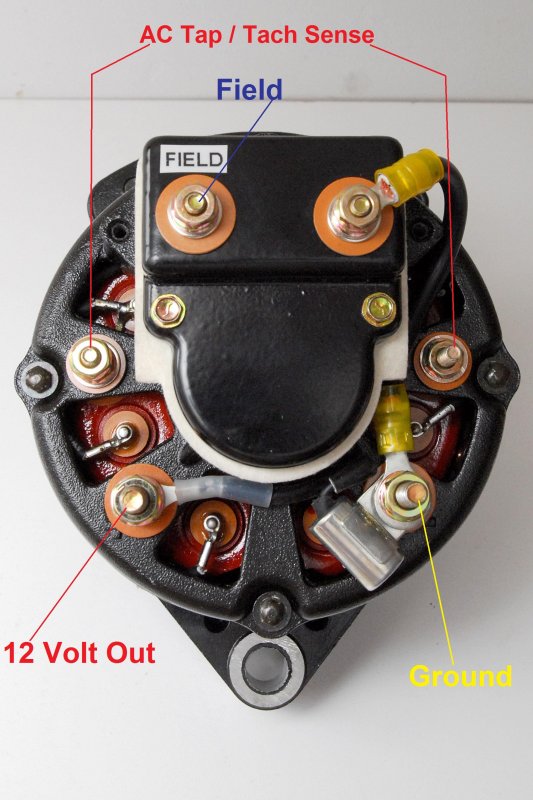
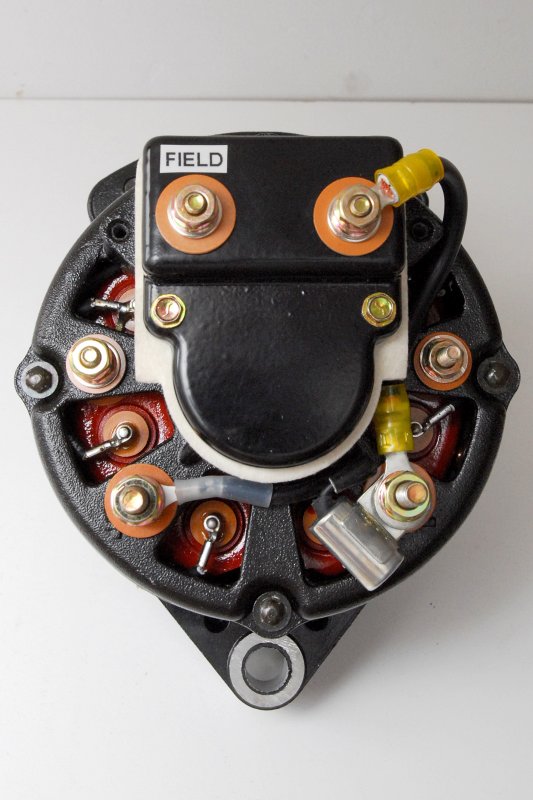
The Wiring
Here is the finished product. One last detail you will need to do is to create a jumper wire from one terminal of the plate to the ground stud on the alternator. This is the black wire in teh photo with the yellow crimp connectors.
Unfortunately my good heat shrink connectors & crimpers were on the boat when I took these photos so I made up a cheap jumper wire for illustrative purposes only.
Leece-Neville recommends a 12ga wire for this jumper. I recommend heat shrink crimp connectors & tinned 12ga wire. If you do not ground one of the cover plate studs to the alternators ground terminal the alternator will not work. The alternators ground terminal must also be grounded to the boats ground.
I also permanently labeled the field stud with my label maker so it is easy to wire and remember which is which. The 12V output stud gets wired directly to the positive side of your boats electrical system . I recommend wiring this directly to a battery, such as the house bank, so you can't fry the alternator diodes by turning off the battery switch when the motor is running.
For your diesel engines tachometer sense simple wire to either of the studs marked AC Tap. You may need to recalibrate your tachometer after the installation of a new alternator. This is a 12 pole alternator.
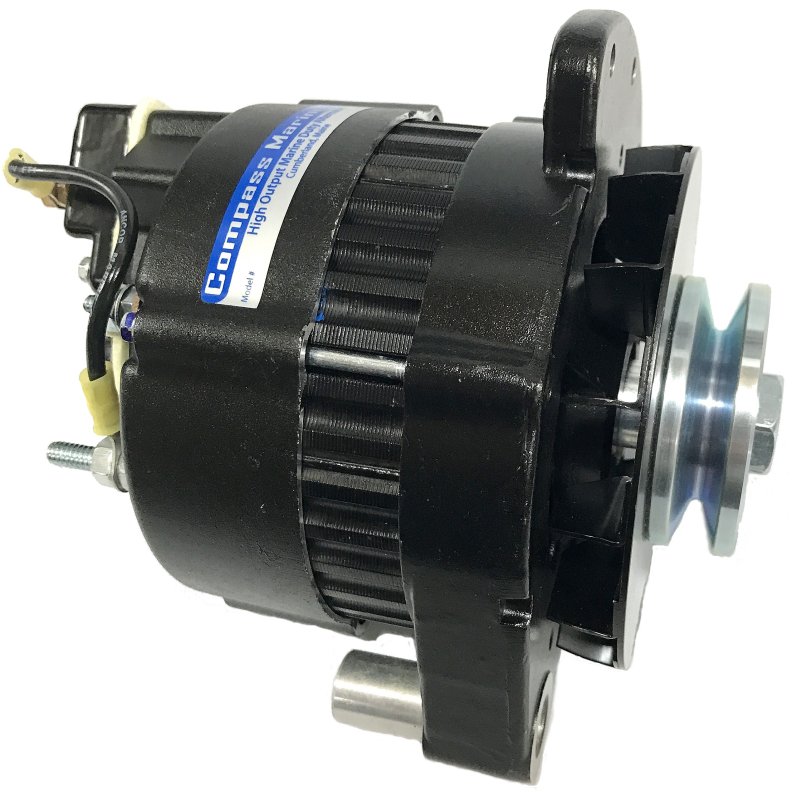
Done
This 90 amp alternator is now ready to be installed and wired to an external three stage regulator. If installing this alternator and using it on a large flooded bank, AGM or GEL batteries you will want an alternator temp sensor.
Please be aware that Leece-Neville offers a number of different 8MR alternators that look the same but that are quite different. For example some have a 2" foot with no "universal adjustment ear" and some have a 1" foot with a large hole designed for a spacer or a 1" to 2" spacer/shim.
The real challenge is finding pulleys to fit these alternators & they do not come with pulleys or spacer/shims. Some are a 17mm shaft & some are a 5/8" keyed shaft. Both usually used cheap stamped steel pulleys not billet machined pulleys. Finding a billet machined pulley that can handle the loads better, than stamped steel, is quite difficult.
These are decent little alternators but they are not a true high output continuous duty alternator. They can be quite reliable but when pushed hard will not last as long a as a purpose built high performance alternator.
You can build one of these for about $385.00 or half the price of a true high output marine duty alternator.. Once converted in this fashion the alternator will be a "P Type" or positive field alternator and can be used with external regulators such as Ample Power, Balmar, Xantrex & Sterling. My personal preference for external regulation is, hands down, Balmar.
*WARNING* - These alts, when converted for external regulation, MUST use alternator temp sensing or preferably Amp Manager or Belt Manager if using Balmar regulators to keep them from over heating. These are good alternators but they are NOT a true high performance alternator and thus must have proper protection from overheating events.
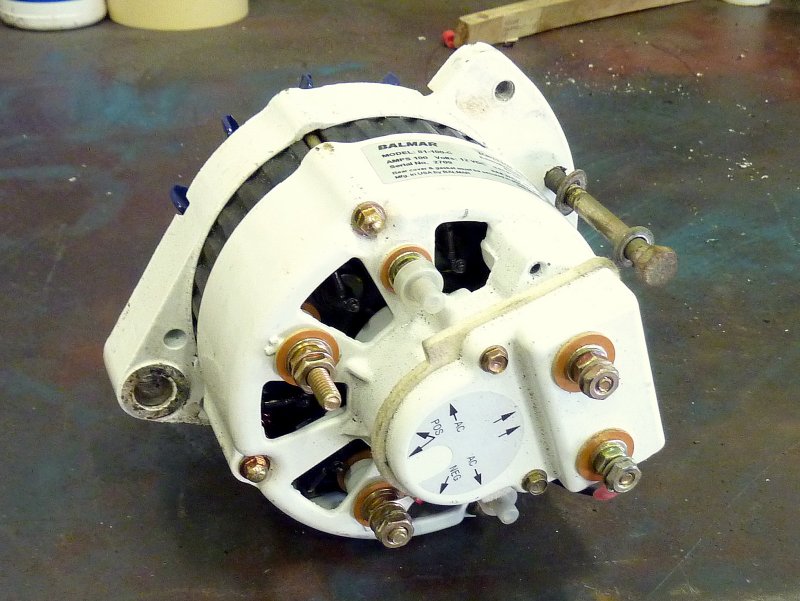
Look Familiar ?
Yes, this is a Balmar Model 81 not the alternator you saw above just painted white. I have had both a Model 81 and a Leece-Neville 8MR apart on the bench and they are virtually identical, on the inside and out even the bearing numbers are shared.
Balmar no longer makes the model 81 and it has been replaced by the newer 6 series alternator. The 6 series is a very, very good alternator, with better performance, and a more robust build than these.
For many years Leece-Neville was one of the main suppliers to Balmar, perhaps they still are for some alternators, but most of them are now physically built by Balmar. The 8MR will run about $340.00 - $385.00 by the time you are done sourcing all the bits and pieces such as the pulley, conversion kit, alternator and spacers/shims. For the performance you get it is not a bad value, but still not a Balmar 6-Series..
If pushing an alternator hard, with a large bank, or you have AGM or GEL you would be wise to consider a more robust alternator.
The newer Balmar 6 series small case alternators are a big leap forward in terms of better cooling, and *higher output for longer periods, but if you don't need that type of performance the 8MR is a decent low cost option to pair with a Balmar regulator when set up for external regulation.
*WARNING: There is no small case alt I know of, including the Denso based alts with hairpin winding's that can be run at full output for long duration's. All small-cased alternators, even "performance based models" require some form of temp protection or current limiting in order to not over heat. This often means buying a larger alt than the current you expect and then de-tuning it or current-limiting it with the regulator.
When setting a regulator up for the 8MR I strongly recommend at least Balmar Belt Manager level 3 to 5 depending upon your load and the time it needs to be in bulk. This will de-rate the available current output of this alternator and allow it to run into large loads for long periods of time without over heating. Running these alternators wide open/full fielded into large loads for hours on end WILL cook them. Use alt temp sensing as added insurance and Balmar Belt Manager as your primary tool to keep these running cool..
05-JUN-2017
Save Some Time & Support MarineHowTo.com
After numerous requests for a complete package I am now offering the 105A 8MR series, already converted, with a 3/8" or 1/2" billet machined pulley and the spacer/shim for just $339.00.
You can purchase this alternator in the MarineHowTo.com web store:
Like what you saw or read in this article? Was it helpful? Could the information save you some money? Would you like to see more articles like this?
If so feel free to donate, support the site, and keep it growing. Please DO NOT feel obligated at all. If you like it and want to make a donation, please do. Your donations help keep the content coming and also help keep it FREE.
Click the DONATE button below if you would like to make a donation via PayPal.