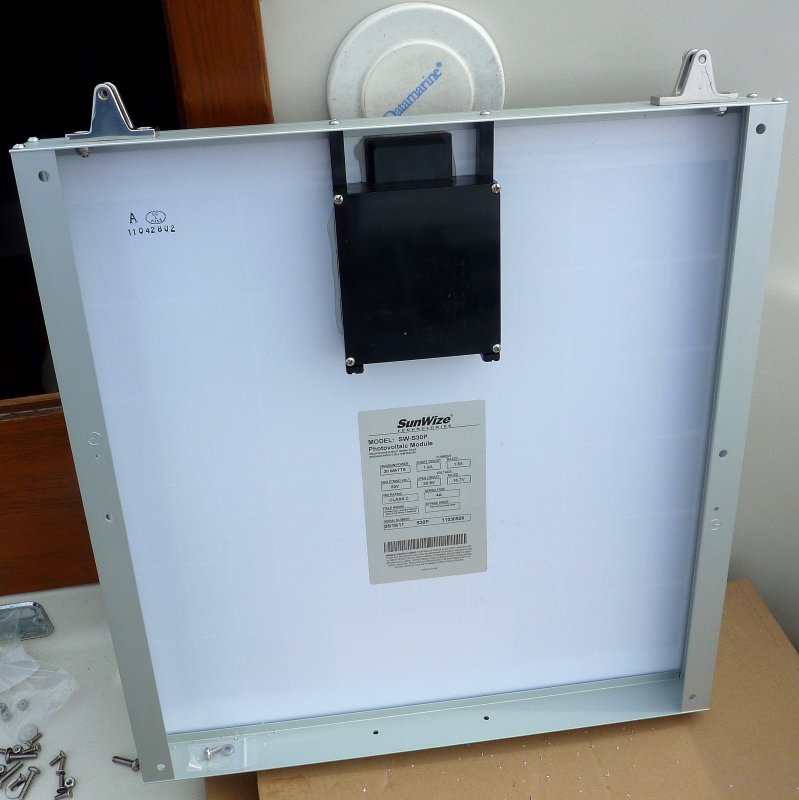
One of my biggest peeves about the solar industry is the move to MC4 junction boxes. These boxes have the wires sealed and no access inside the j-box under the panel. In the marine environment I personally prefer a j-box with a terminal strip. It allows for easier paralleling of the panels and if installed correctly they last for a long time. I always try to find panels that do not ship with MC4 connections.
This Sun Wize panels ships with a standard j-box. Most DIY's do not own the proper crimp tool for crimping MC-4 solar connectors. If you buy a panel with MC-4's you'll either need to pay to have them terminated or pay to buy the proper crimping tool.
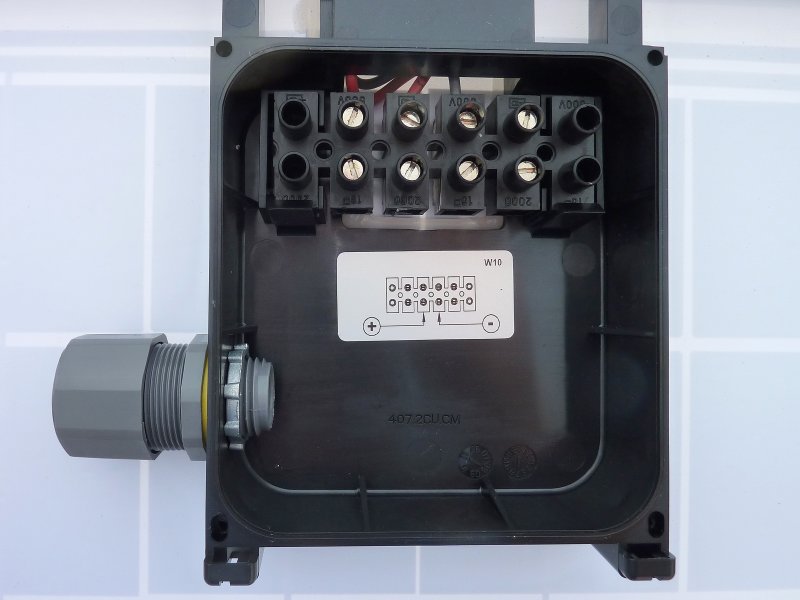
Inside the j-box you simply connect your panel output where shown. Keep in mind this is a small 30W panel. Bigger panels use considerably more robust terminal strips. This is a small "Euro" strip because the panel is small.
Please be aware that the knock outs on this brand of panel are tough as nails. Please be VERY careful knocking them out or you could break the j-box and destroy the panel..
23-SEP-2011
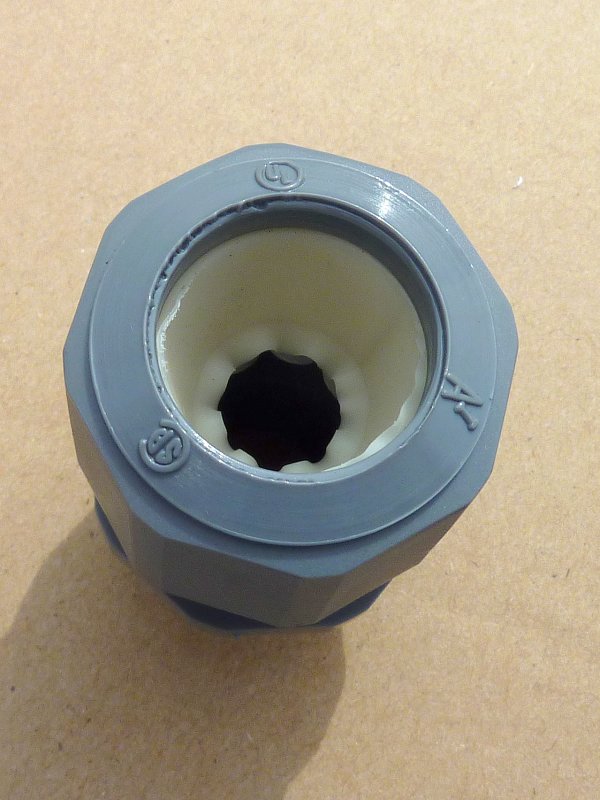
Water Proof Cable Clamp
For the cable entering the j-box I use a waterproof cable clamp. I pick them up at my local electrical supply house for about $3.00 each.. Well worth the expense. They work best if you use a round cable. If using 4GA or larger cable each wire gets its own water tight entrance to the j-box.
Most marine wire is not UV stabilized. Despite the lack of UV inhibitors it can still last in the five to ten year range out in the sun, depending upon where you are. A UV stable SOW, STW, STOW, SEOW, or STOOW type cable can work well and can often be ordered in sizes up to 6/2. These cable types are the same or similar jacketing used in shore power cords and they hold up quite well in solar applications..
23-SEP-2011
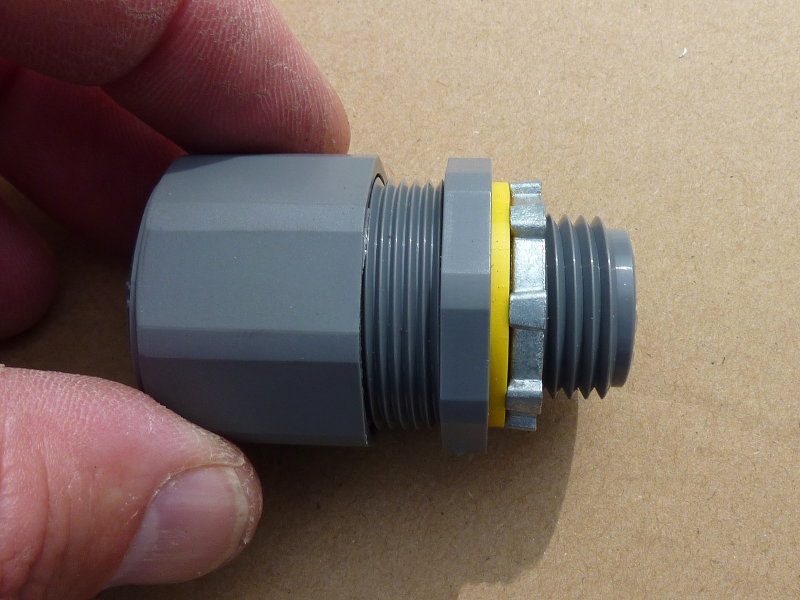
The Water Tight Cable Clamp
Here's a close up.
13-SEP-2012
Series or Parallel Wiring ..?
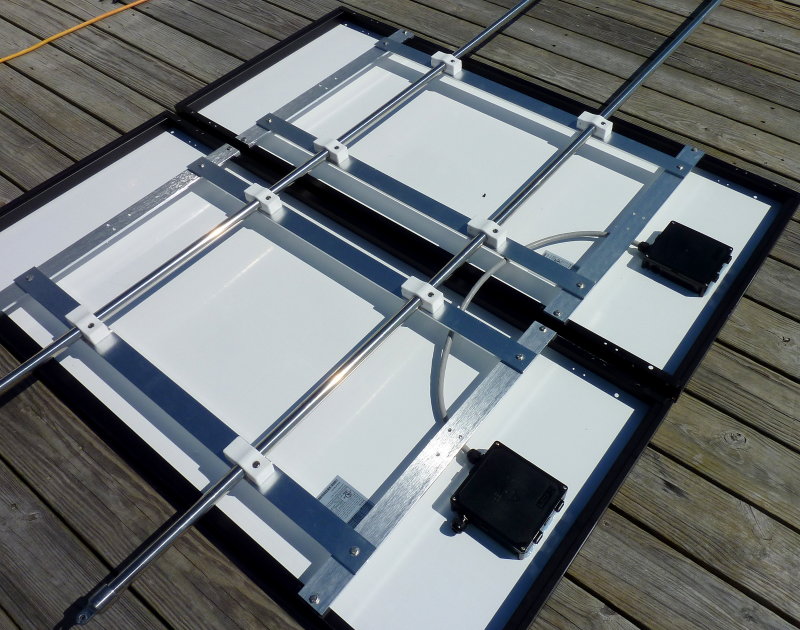
In this photo I am getting ready to install two 140W Kyocera panels for a nice 280W array capable of delivering about 70Ah's + per day to the battery bank, in Maine. They have been wired together in parallel as evidenced by the gray duplex wire running between them for the best performance, on this boat. The term "on this boat" are key to performance.
I get asked quite often about wiring multiple panels together. "Should I wire them in series or in parallel?" is the most often asked question I get. My answer to that question is almost always to wire them in parallel, on a sailboat. The real answer is that "it depends"...
Mono or polycrystalline panels are made up of a series or a daisy chain of solar cells. If you block one of these cells it acts much like a plugged sink drain stopping or greatly minimizing the "flow". Blocking just a small portion of one cell, with shade, can cut the output of both panels, if they are wired in series. The answer to this question is far more complex and really requires actual testing on YOUR BOAT to determine the best overall performance. For the most part though you can do very, very well by wiring the panels in parallel, however, in certain installations series is the clear winner. See, it depends.
By wiring the panels in parallel the shaded panels drop in output will not as drastically affect the other panels output if it is not shaded. When shading occurs across one small area of two series wired panels the output of both can be more drastically affected. When shading occurs across one of the two panels, in a parallel wired array, the other panel still pumps out its current unaffected by the shaded one.
In a perfect lab type scenario series panels with an MPPT controller work really well. Sailboats however are any thing but perfect when it comes to shade. Parallel wiring of multiple panels is often the best scenario, on a sailboat, but not in every case. If you really want to know what is best on your boat for your use then it will need to be measured over time.
Shade, the big "S" word in solar systems, is a real enemy. In this short video we can see the % output drop by shading just a small corner.
Effect of Shade On Panel Performance
As can be seen in the video even a small amount of shading drastically cuts into the output performance.
10-OCT-2014
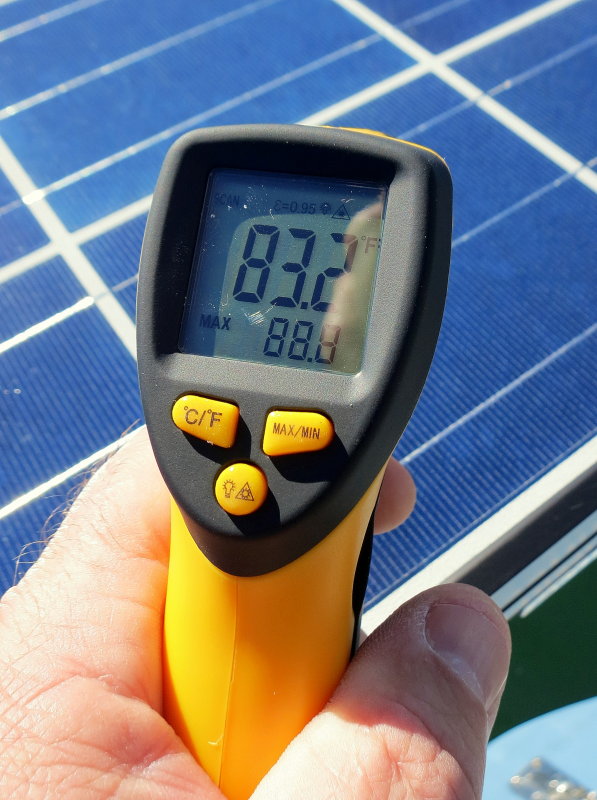
Panel Temperature
One often over looked aspect, that impacts solar performance, is the temperature of the solar panels. Solar panels are rated at what is referred to as STC or Standard Test Conditions. Depending upon the manufacturer this might mean a panel specifications label rated at 20C (68F) or 25C (77F). The Sunwize panel in the beginning of this article is rated at 30 W & 1.8A. However, this is based on a STC temperature of 25�C at an irradiance 1000 W/m�. This means that in order to see 1.8A you will need less than a 77F panel temp and an irradiance level of 1000 W/m�.
How long do you think a panel will remain at 77F in full sun? Will you always have 1000 W/m� irradiance levels? Heck no! These ratings are "best case"... How long will it stay at 77F? The answer is not very long, unless it is a cool day.
On boats we get a bit of a break because the panels are mounted horizontally, and the boats, when at anchor, are facing into the wind thus forcing some cooling effect across the panels. On land they are often on roof tops where cooling is minimal compared to a boat course those panels can be aimed and ours can't so any direct comparison of performance becomes very difficult....
Simply put, as the panel or panels heat up the available output performance goes down. Simple stuff. MPPT controllers, for example, count on sufficient voltage to effect a boost when tracking the panels maximum power point. As the panels heat up the MPPT controller simply has less voltage differential to work with, compared to battery terminal voltage. With less available voltage at lets say 115F it can't boost as well as it could at 77F....
The point?
#1 Don't expect rated 20C or 25C performance from the panel in mid day sun. Look at your daily cumulative totals and average them out.
#2 Do not place panels directly on the deck where they will have less chance of shedding heat.
#3 Consider a 24V nominal panel if you are using MPPT or test your vessel for series performance over parallel. In theory series & MPPT would always win, but in reality, on a sailboat, it does not always win due to shading.
16-DEC-2011
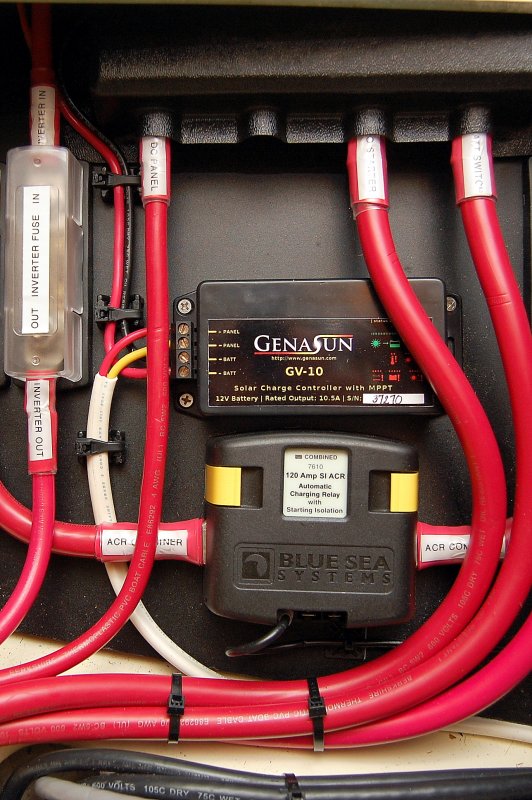
Wire The Controller
A solar panel sized to actually "re-charge" a bank, not just maintain it, should ideally be routed directly to the house bank. The white jacketed wire coming into this Genasun controller is the panel feed. The connections are easy and clearly labeled on most controllers. Hooking them up is the easy part.
The black & red wires leaving the controller go to the house bank. The red wire is "switched" so the panel can be turned off if needed. Check with your controller manufacturer to see where an ON/OFF switch can be installed if you want the ability to flip the panel OFF. ON/OFF switches are normally installed on the battery/output side of a controller but this can vary from manufacturer to manufacturer.
There is also a fuse in the red wire between the battery bank and switch, that can't be seen. It is installed close to the battery + post. When connecting anything directly to a battery bank the wire should be fused. The ABYC suggestion is for the fuse to be within 7" of the + post of the house bank. While not always possible to be within 7" try to get it as close as possible.
If you have a secondary starting or reserve bank you can then use a device like an Echo Charger or an VSR type relay to charge the start or reserve bank and keep it topped up. Even without a solar panel an Echo Charger or VSR are useful devices.
Some charge controllers, such as the Morningstar SunSaver Duo PWM, can charge two banks simultaneously. This is a nice feature if you don't have an Echo Charger or VSR to charge two banks from one array.
10-MAY-2013
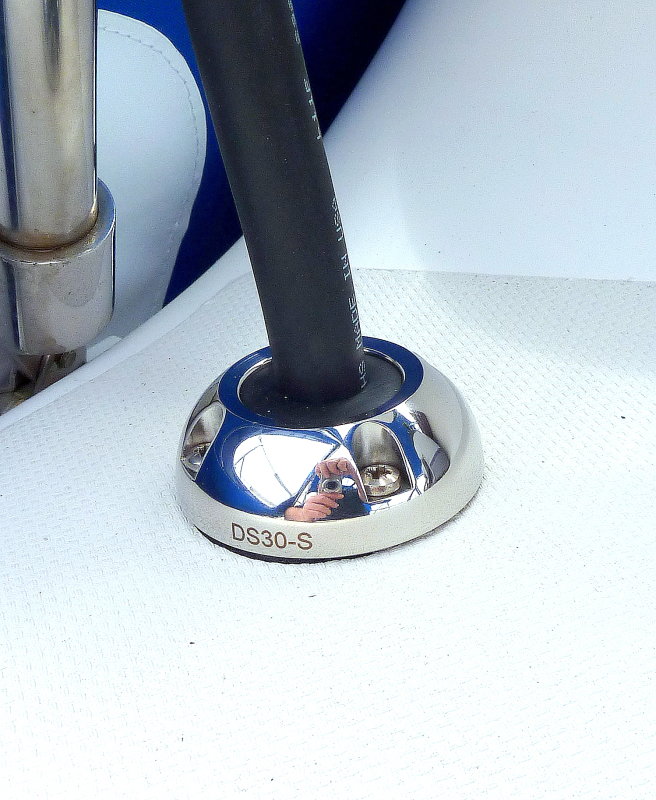
Deck Gland
There are many ways to get your solar wires into the boat but few are as elegant and reliable as the ScanStrut watertight deck glands. I prefer the robust stainless versions but they also make them in a plastic body version as well. This one is a ScanStrut DS30-S.
23-SEP-2011
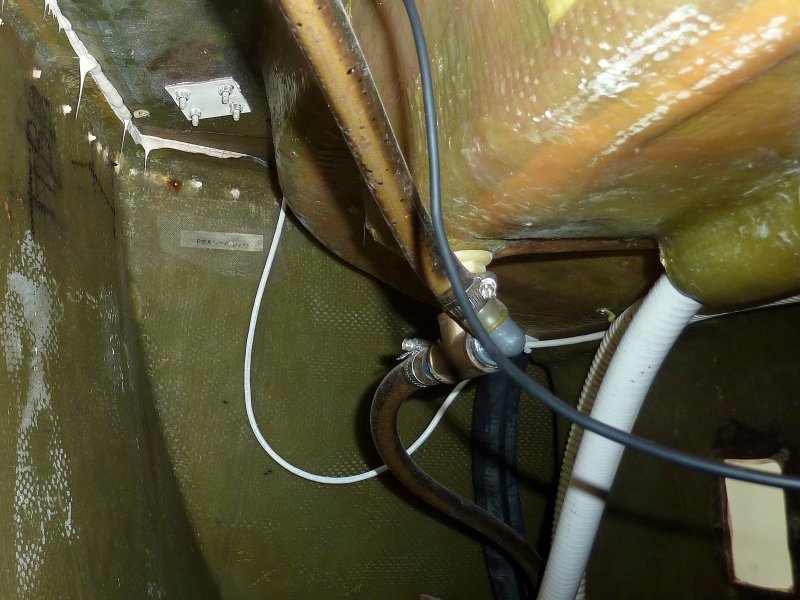
Internal Wiring
When bringing the solar panel wires into the boat it's a good idea to enter the boat with a "drip loop". Deck and fitting leaks happen, it's just the nature of boats, and even "cable clams" can leak.
In the event of a leak the last thing you want is for the leaking water to migrate along the wire all the way to the controller, or another device near the wire that should not come in contact with water.
As always secure the wire well with wire ties on its path to the controller. This one mounted to the underside of the cockpit sole with Weld Mount tabs and wire ties.
23-SEP-2011
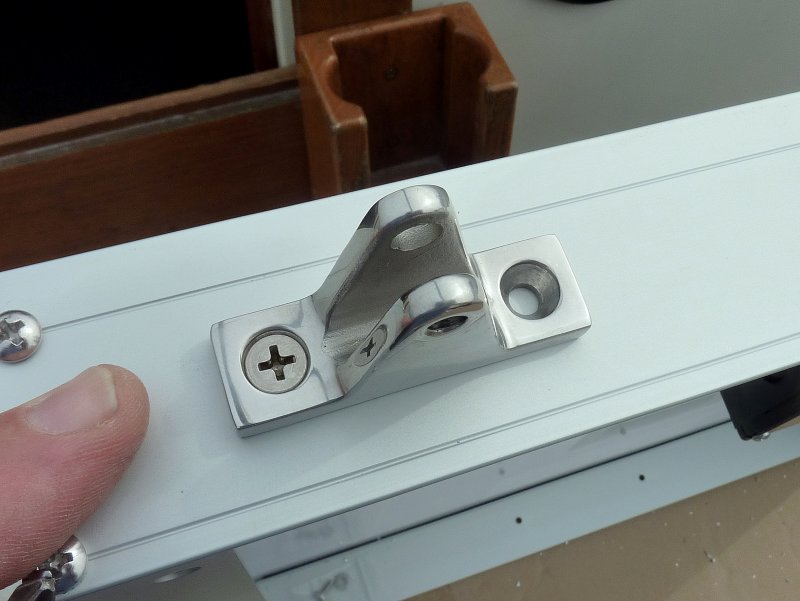
Mounting The Panels
For mounting the panel shown in the first photo I used standard marine canvas parts. This is a standard SS deck hinge fitting. Simply drill the frame and mount two hinge fittings.
23-SEP-2011
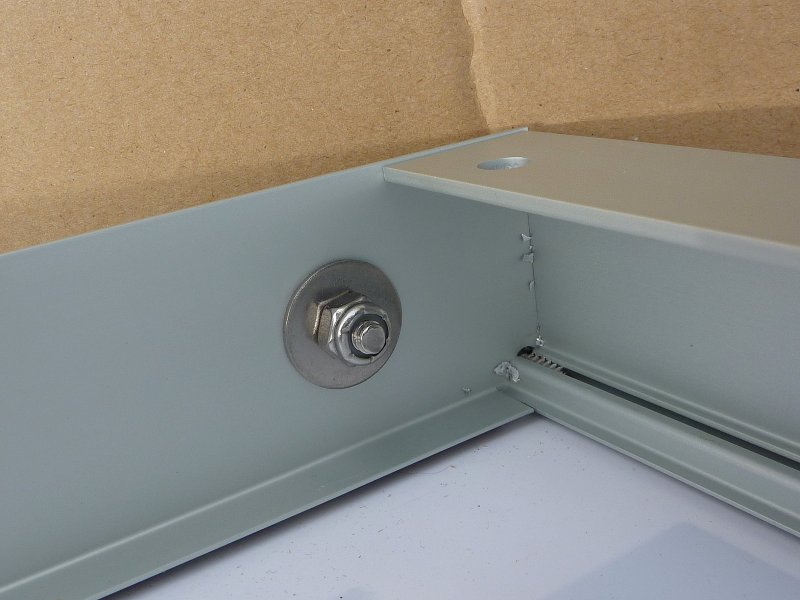
Back Side
In this photo I am showing the back side of the frame mounts. I used some SS fender washers to stiffen the aluminum frame a bit and nyloc nuts so they don't work loose. A little Tef-Gel under the washers seems to prevent stainless/aluminum interface corrosion.
23-SEP-2011
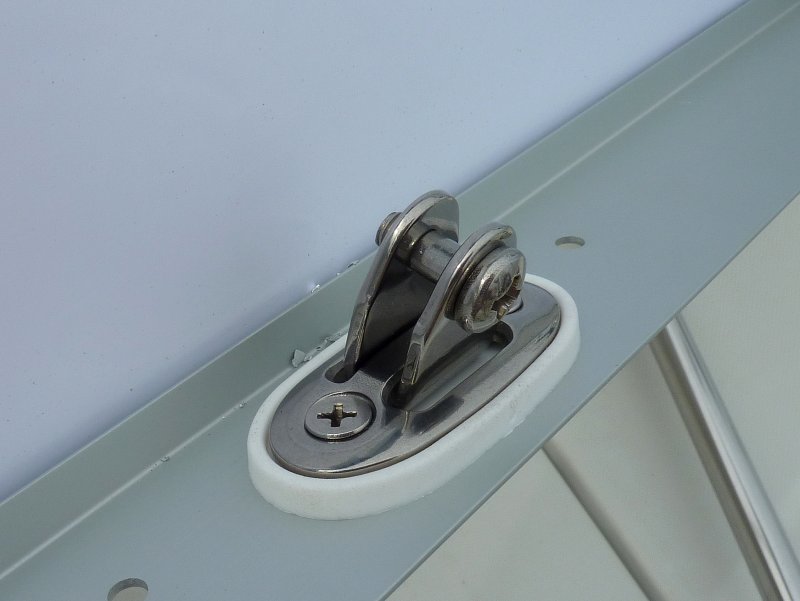
Articulating Deck Mount
This is a foot designed for dodger or bimini mounting on an uneven surface. They are hard to find but most any sail or canvas maker could source it. They are not cheap however. This one runs about $35.00 retail.. The nice thing about this mount is the plastic bushing that isolates it from the aluminum.
The articulating deck hinge accepts the angled 1" support bar and makes for a nice neat looking install.