07-DEC-2017
Old_Web_Site.jpg
This old format has run its course and the new site is now up and running. Articles here will no longer be kept current, or up to date, and eventually this site will go the way of the buggy whip.
Please change your bookmarks and visit the new site. See new links below.
Solbian Layout
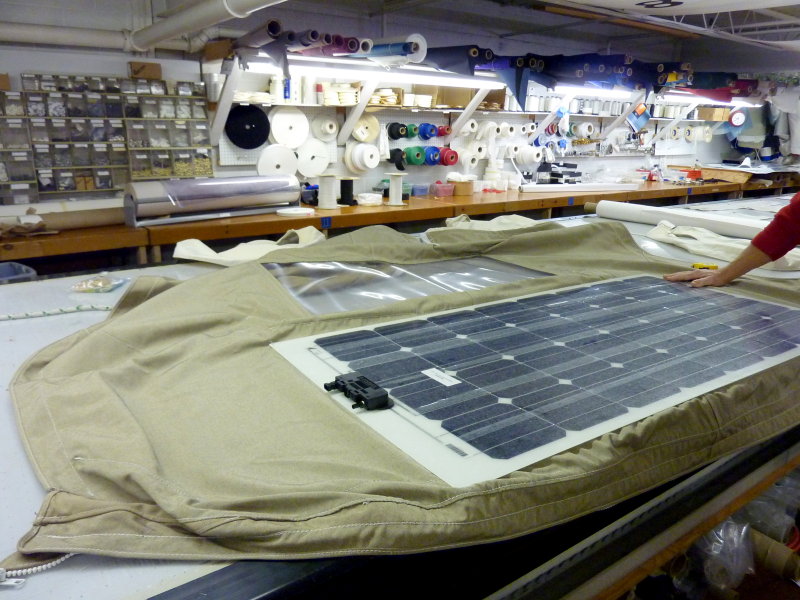
Solbian solar panels are a unique product that fill a great niche for the marine market. They are thin, light and efficient. They are also semi flexible making them quite versatile in mounting options.
In this photo a Solbian CP-125 panel is being laid out on a used bimini. My canvas maker Richard Hallett of
Hallett Canvas & Sails (LINK) decided on Velcro for the fastening of the panel to the bimini. Because the entire panel weighs just 5 pounds direct mounting to most soft bimini tops makes this a very neat and tidy fitment.
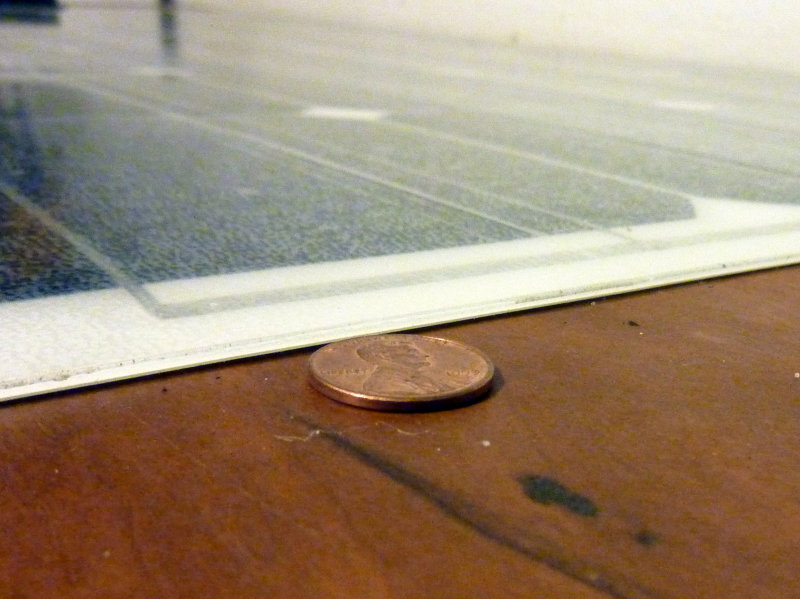
Very, Very Thin!
As you can see by the photo the Solbian panel is very thin. Unlike previous armorphous "flexible" panels the Solbian's are a monocrystalline panel. This makes them about half the size of a comparable armorphous panel and very efficient for the real estate they take up.
The benefits of a Solbian panel can be unique and necessary for some installations. Are these panels more expensive than traditional panels? Yes certainly, $820.00 vs. approx $350.00 (for CP-125), but you can often save more money using a Solbian than by using a traditional rigid panel.
Things to consider:
#1 Light weight means it can be affixed to most any Sunbrella type bimini or dodger (consider shading on dodgers).
#2 This weight savings usually means the original bimini frame is more than strong enough for the added weight of the Solbian solar panel. The last rigid solar panel I installed, in the 125W range, weighed 28 pounds. This was just the weight of the panel alone and did not include the extra stainless tube, fittings & aluminum framing needed for attaching it to the bimini. When all was said and done this single 125W panel added over 40 pounds to the top of the bimini. The Solbian CP-125 added perhaps 6 pounds total. That is a huge weight savings.
#3 When fitting a traditional rigid panel to a bimini, a frame needs to be custom built at the expense of the fittings, stainless tubing and the aluminum support frame for the rigid panel. This can run into the hundreds of dollars in just supplies not including custom tube bending/crowning etc. etc..
#4 When fitting a rigid panel to a bimini the bimini often needs to be converted to a full strapless type bimini. The fittings and stainless tube for this add even more money to the install.
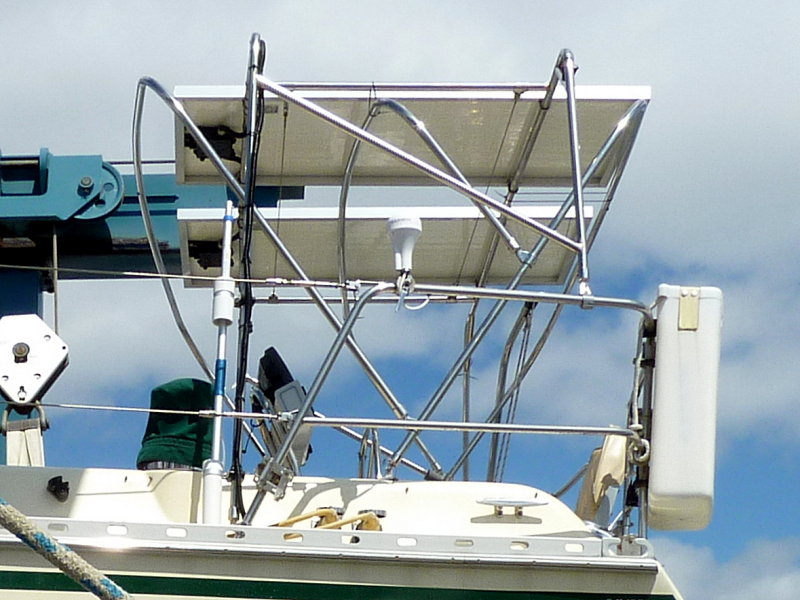
Prime Example Of Solbian Benefit
Sorry for the grainy photo.
In this photo you can see two 130W Kyocera rigid panels installed onto a custom built frame. The owner had this fully custom frame built to fit over the existing bimini in order to support the weight of this 260W array. The cost of this installation far exceeded what the cost would have been to install two Solbian CP-125 panels. For the 10W difference the savings on this install would have been quite large even with the Solbian panels costing twice as much.
The Solbian's can also easily be removed and stowed where the rigid panels become bulky, tedious and can damage your vessels interior..
Velcro Attachment
Richard of Hallett Sails decided that dual Velcro, both top and bottom, with a lapel was the best method to attach the panel to the bimini. Suffice it to say it is a very, very robust attachment.
The owner of this boat, an avid offshore voyager, has been caught in off shore storms before and wanted a solar option that allowed the easy removal of the panel. He also did not want a panel with a bulky, sharp aluminum frame to try and stow below in rough seas or for storm prep.
This Solbian CP-125 panel will easily stow below a berth cushion and not even be noticeable. He also did not want to re-invent his bimini frame which was simply not strong enough to support the weight of a rigid panel.
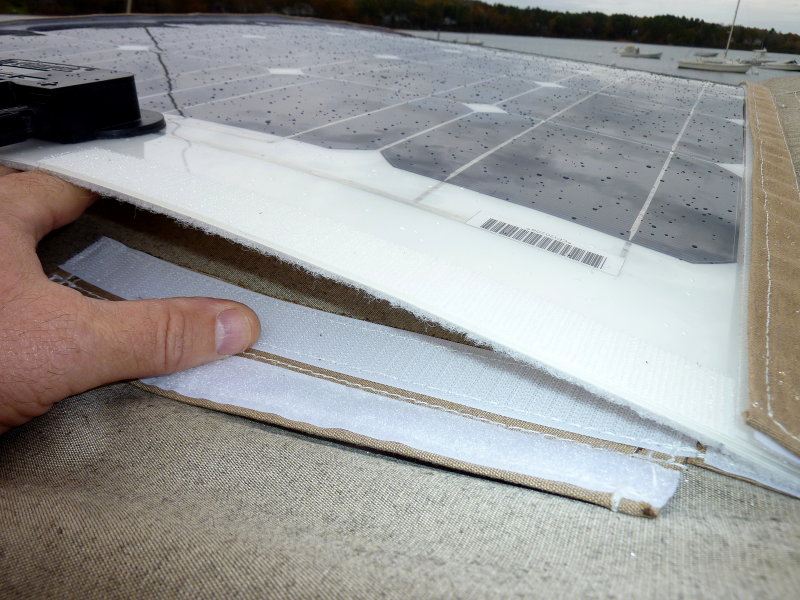
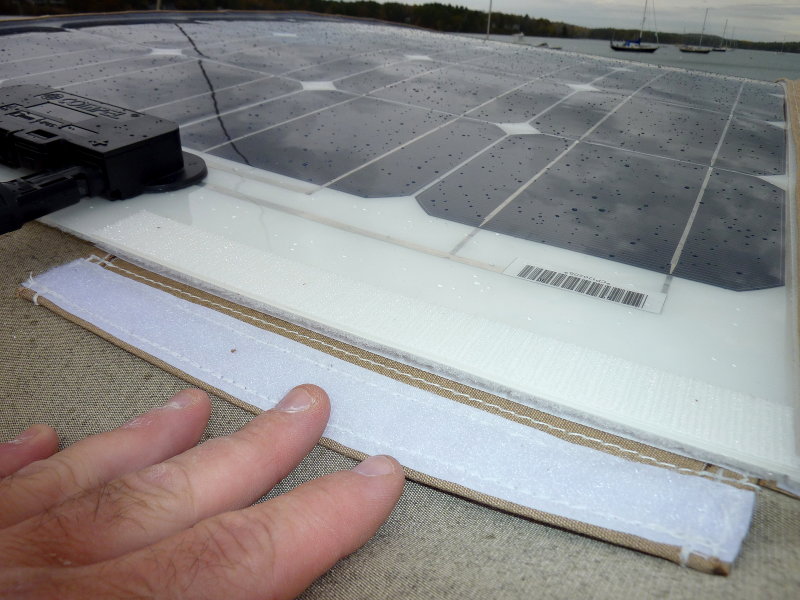
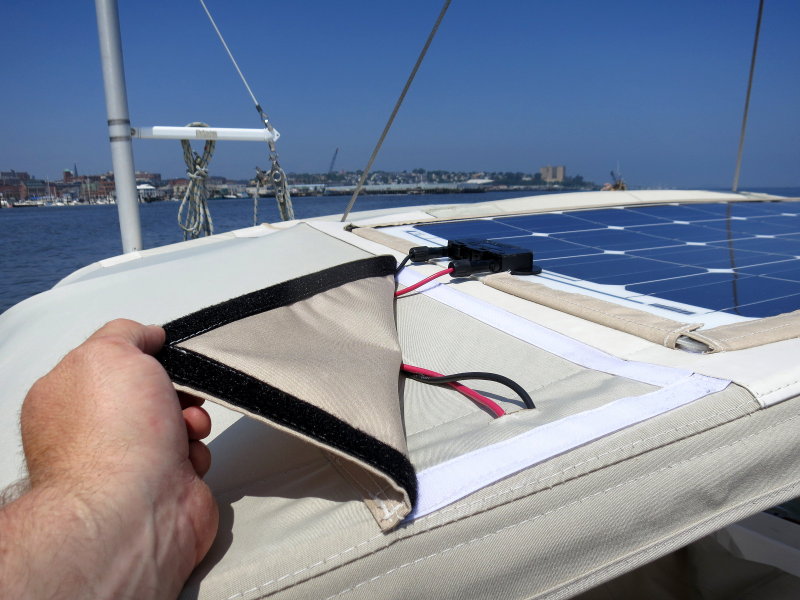
Velcro Lapel
This picture shows the panel bottom Velcro and the top Velcro. The lapel is simply folded over the panel to button it up.
Also take note of the slim profile of the panels junction box compared to my fingers. When stowed beneath a berth cushion you are barely able to discern a bump in the foam. This is a very nice feature for a 125W panel. There are also no sharp edges to scratch a beautifully varnished interior!!
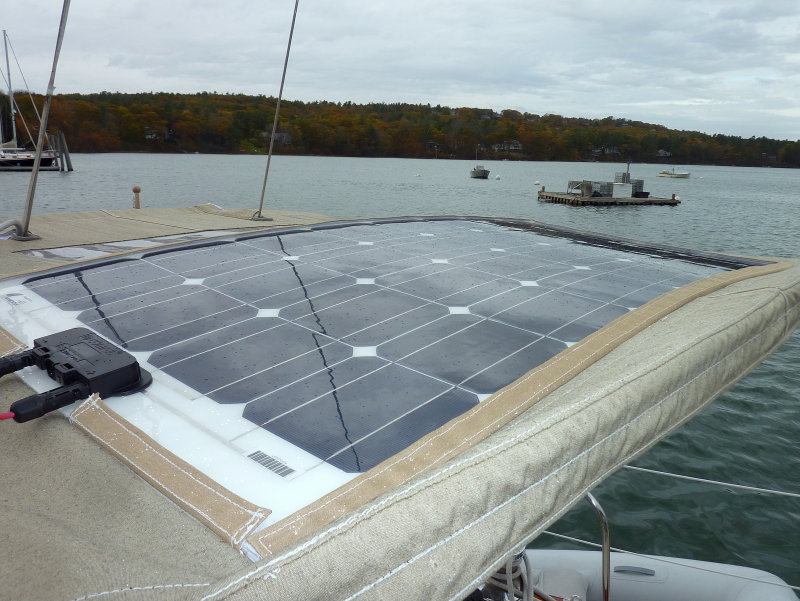
Ready To Go
Here you can see the Velcro lapel affixed to the panel and the junction box connected to the feed
wire via MC4 connectors.
While I am not usually a big fan of MC4 connectors, in the marine environment, they do make sense for this type of installation. Coating them with a terminal grease helps prevent corrosion..
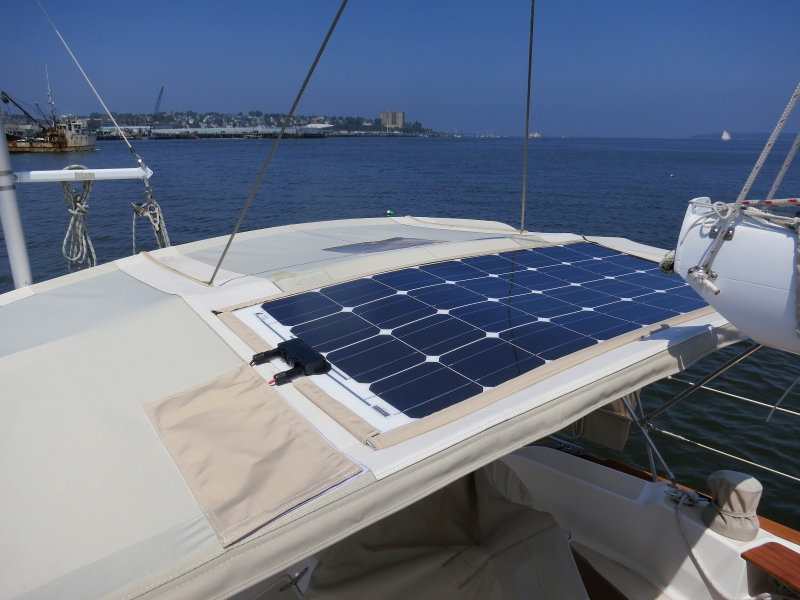
Yes Sunbrella Can Fade
This owner is going to eventually replace the canvas but this gives an idea of just how much it can fade in 7-8 years or so.
Rather than reinvent the bimini around the new panel the owner opted to just re-stitch for now and add the panel. The cost was minimal for the canvas work.
The primary role of this panel is to keep his Lifeline AGM batteries charged on the mooring. This boat is not sailed off a dock. Because his boat is mooring sailed getting his expensive AGM's back to 100%, as often as possible, was the main goal.
The owner also has a high output alternator and external regulator so the panel is only really taking his bank from 80-85% state of charge back to 100%. This was accounted for in the sizing. His bank can go from 85% SOC to full in about 2-3 days with this panel.
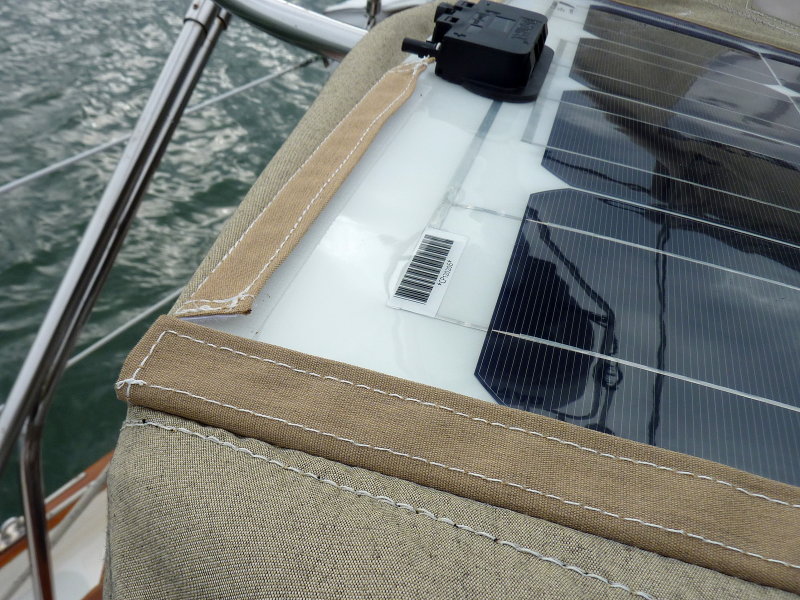
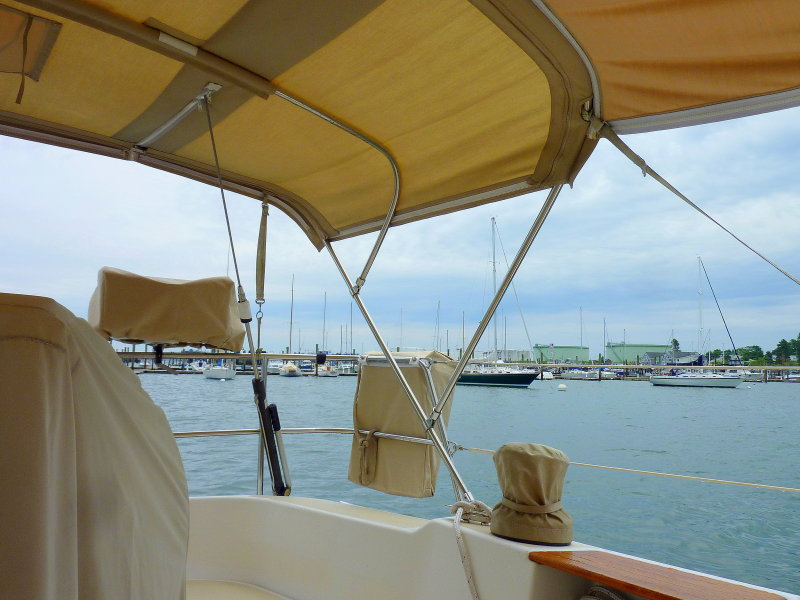
Wire Lapel
Here is another boat with a similarly aged bimini. What we are looking at here is the Velcro lapel to cover the wires. If the canvas was not so faded it would look much better!
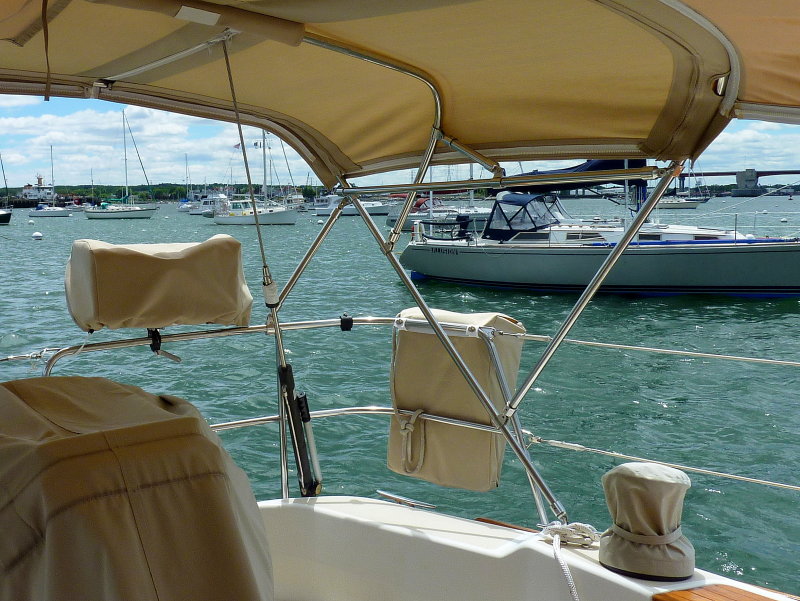
Wire Lapel Access
This just shows the wire access. It is Velcro on two sides and sewn on two sides. I find it best to trim the heavy jacket from the wire and just use the inner conductors coming up through the bimini.
Bimini & Frame Before
Not all bimini tops are created equally and there are vast differences in canvas makers and their ability to produce a quality product. This bimini was a prime example of a canvas maker who should consider serving Slurpy's at 7 Eleven instead of making canvas.
The owner was not yet ready to invest in a new bimini so I modified the frame to tighten & stiffen the bimini to accept the Solbian panel.
What was wrong with this bimini & frame?
**Elcheapo support straps that stretch when wet and cause tripping hazards the rest of the time.
**Bimini over 10' wide using thin walled 1" tubing.
** No support struts to prevent yawing side to side. Under sail this bimini was moving almost 6" side to side at the top curve of the bimini tube.
** The middle bar did nothing but pull the canvas down in the middle thus creating a great spot for a puddle to drip on the owners head.
** Cheap thread was used and the bimini needed a full re-stitching in less than 4 years.
** The bias of the fabric was not considered and one panel had the bias going entirely the wrong direction.
** The fit of the fabric to the crown and curve of the bimini frame was HORRIBLE!
In short a third grader with a Playschool sewing machine could have done better work.... NEVER choose a canvas maker based on price choose them based on ability! Canvas work is an ART FORM.....
Bimini & Frame After
The raw reality is that no matter how much frame work you do you're not going to turn a childs preschool drawing into the Mona Lisa....
What I had to do to this frame was run angled supports to the stern pushpit in order to help minimize the side to side sway. This was still a 1" OD X 10' plus wide bimini using cheap, thin walled tube. The cross braces helped immensely but a proper frame, in thick walled 1.25" tube, is really in order. Who ever paid for this canvas originally, got royally screwed.
I next installed a strut between the aft frame and the fore frame to tension the fabric. Because the fabric never fit right to begin with it still was not a perfect fit. I was able to get it tight enough for the Solbian panel. This bought the owner some time until a qualified canvas maker could build him a new bimini. The aft eye-end jaw is adjustable and Gemini stand offs were used for the fore to aft strut.
Once the fore and aft frames were tensioned the third (middle) frame was still pulling the mid point of the fabric into a puddle forming dip. I used a third short bracing strut to force the third frame into doing its job. Again, because the fabric never fit right to begin with, and this bimini was horribly made, I did the best I could with what I had to work with.
Most bimini's will require some additional support when you add another 5-10 pounds on-top of them. By going to rigid supports, as opposed to stretchy nylon, you lose the forward tripping hazard and you can properly tension the fabric. Once tensioned the fabric should not stretch any further, unless the bias is incorrect.
Consider working directly with a qualified canvas maker when designing your bimini to accept a semi flexible panel. The bimini should fit drum tight and be well braced both fore and aft and side to side.